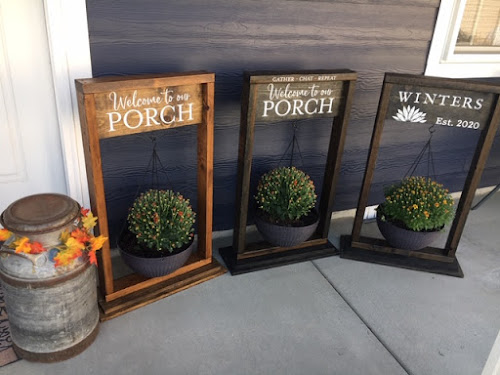
Here are the steps to make your own. Remember, I always suggest taking an idea and making it your own. Paint it a different color, use different accents, or maybe just a different sentiment. Have fun and CREATE!
Step #1: Design
I decided to use two different stains, a fun transfer, and a transfer so I could spell out our friend's last name.
Step #2: Materials
Stains used-MinWax Wood Finish Ebony & Dark Walnut
Sealer-Rust-oleum 2X Ultra Cover Satin Clear
Wax-MinWax Paste Finishing Wax
Paste- Chalkology Paste Bright White
Small Squeegee
Transfers-Welcome To Our Porch, Rustic Font
Sponge paint brush
Old socks
Vinyl coated hook
Get supplies HERE
Step #3-Cut Wood
Welcome Board 1x8 (19 inches)
Top & Bottom 2x4 (22 inches) Need two
Sides 2x4 (36 inches) Need two
Bottom base 1x10 (26 inches)
2nd bottom base 1x8 (24 inches)
Screw all pieces together. I also used wood glue on the bases and clamped them to dry before I screwed them to the main piece.
Step #4: Stain
Stain all of the wood. This is the easiest part but messiest! I use gloves and an old sock. Generously put the stain directly on the wood with a sponge brush. I let it set for 2-5 minutes. The longer you leave it on the darker it stains.
Wipe off the excess with the old socks and let dry 24 hours.
Step #5 Wax
Because I am using a transfer, I suggest using finishing wax before you chalk. Wax just a bit on the area you are chalking and wipe off the excess.
Step #6 Chalk!
Fuzz your transfer if it is new. (use a towel or fuzzing cloth). Place it where you want it and press out any air bubbles.
Use a small amount of chalk-a little goes a LONG way. Use your squeegee to apply and remove excess chalk. Lift up transfer and VIOLA...beautiful image!
Step 7# Final Coat to Protect
After chalk is dried (only takes a few minutes), use a finishing spray to protect against the elements. These are going outside so this step is a must to protect your planter.
Final Step: Hook and Plant
Attach a hook by pre-drilling a hole underneath the sign and screwing in the plant holder. I just added a cute plant to my planter basket.
That is it! It is so easy and is very impressive!
Here are the final products! I think they turned out great and I ended up gifting others with one too!


